
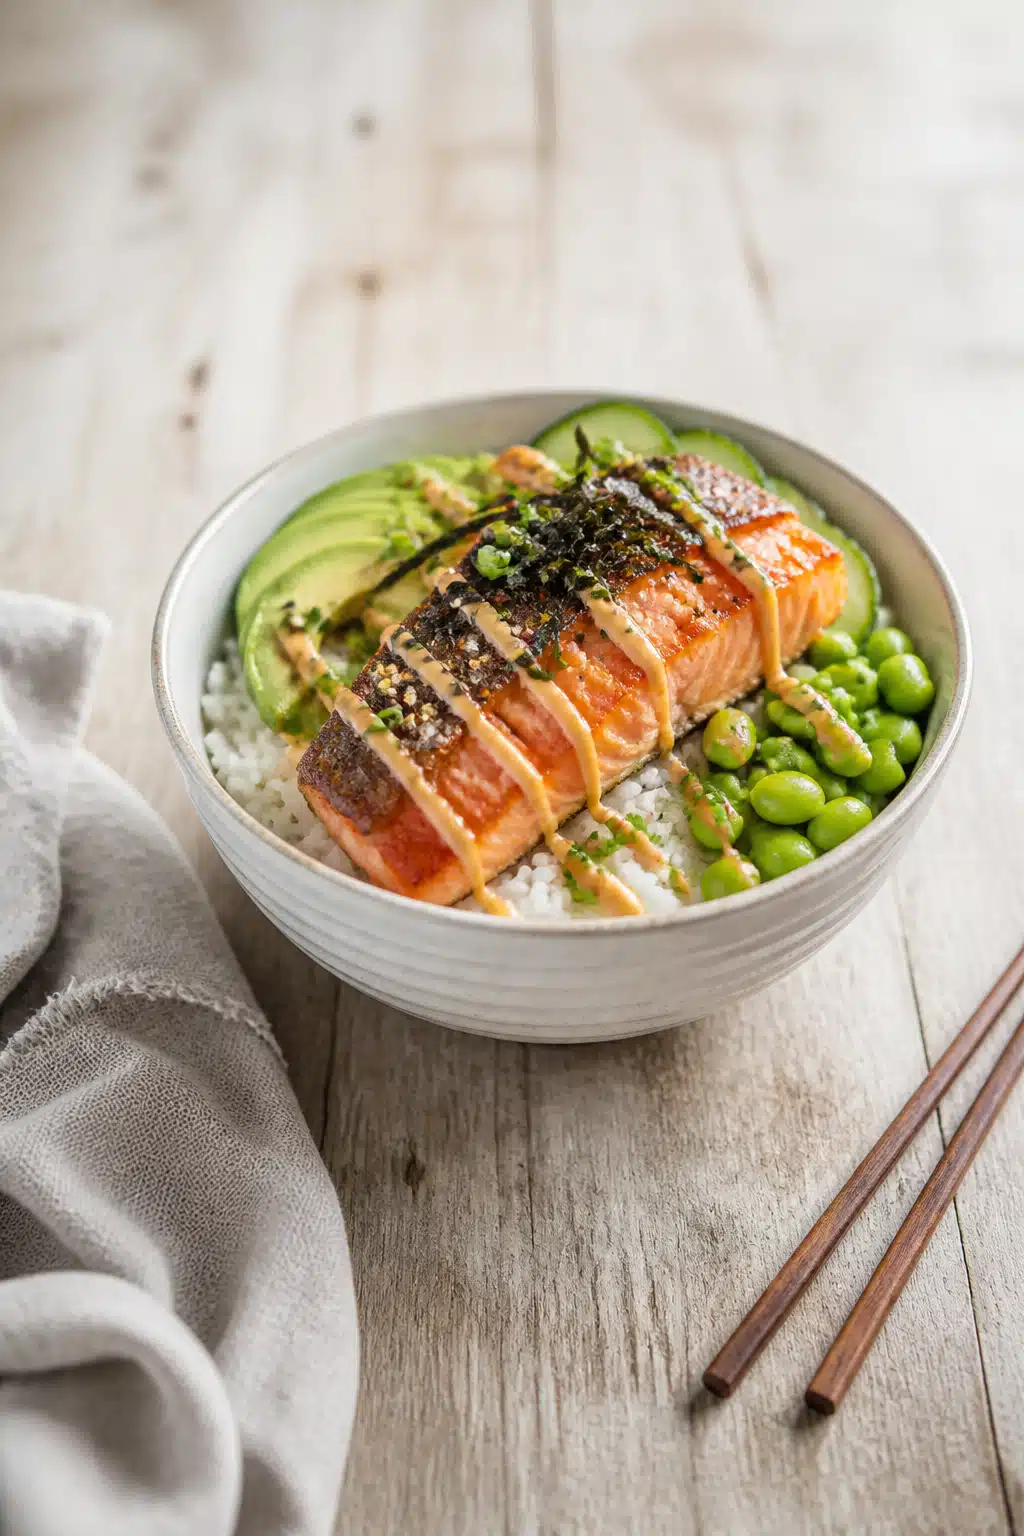
Crispy Salmon Rice Bowl is your shortcut to a restaurant-worthy meal in just 30–40 minutes—right at home! Imagine perfectly crispy salmon lying atop a pillow of seasoned sushi rice, crowned with creamy avocado and a burst of crunchy, fresh toppings. This is the Crispy Salmon Rice Bowl you’ll crave for weeknights: healthy, flexible, and shockingly easy, whether you’re cooking for yourself or serving a crowd.
This bowl isn’t just about flavor; it’s engineered for health and simplicity. You’ll get macro-balanced nutrition (about 700–750 kcal, 33–36 g protein per serving), diet-friendly swaps (gluten-free, keto, vegan), and clear, actionable meal-prep strategies. If you love home-cooked meals but want something that *truly* matches your favorite sushi spot—without fuss—this recipe delivers.
🍽️ Recipe At A Glance
- Prep Time: 15 minutes
- Cook Time: 20–25 minutes
- Difficulty: Easy
- Servings: 4 servings
- Why This Recipe Works
- Ingredients You’ll Need
- Step-by-Step Cooking Instructions
- Recipe Variations & Dietary Modifications
- Serving Suggestions & Pairings
- Storage & Meal Prep Tips
- Nutritional Information
- Conclusion
- FAQ
Why This Recipe Works
There’s a reason the Crispy Salmon Rice Bowl wins hearts: the magical contrast of textures and flavors in every bite! The crispy salmon skin or golden crust meets the delicious softness of sushi rice—each grain perfectly fluffy, never gummy. Vibrant avocado and edamame add creamy and crunchy pops, while a bold, creamy sauce ties it all together.
The secret lies in three key techniques. First, moisture management: patting the fish dry and dry-brining ensures a glassy, shattering-crisp exterior. Second, precise rice chemistry: rinse your short-grain rice in cool water 3–4 times, then soak 20–30 minutes before cooking with a 1:1.10–1.25 ratio of rice to water. Third, assembly: bold yet balanced toppings for maximum color, nutrition, and satisfaction.
Just imagine all of those flavors alongside a spicy mayo or umami miso sauce. Whether you think of this as a salmon avocado rice bowl, an easy salmon bowl recipe, or your new favorite sushi bowl, you’ll taste restaurant-level results every time.
Ingredients You’ll Need
- Salmon: 4 x 4 oz (113 g) skin-on salmon fillets (see “Costs” for buying sushi-grade!)
- Sushi Rice: 1⅓ cups (240 g) Japanese short-grain rice, uncooked (makes ~3 cups cooked; ¾ cup/150 g per bowl)
- Water: 1½–1⅔ cups (330–400 mL), depending on method
- Rice Seasoning (per 3 cups cooked rice): 1½ tbsp rice vinegar + 1 tsp sugar + ¼ tsp salt
- Avocado: 2 medium (cut, ½ avocado or 75 g per serving)
- Shelled Edamame: 1 cup (140 g), cooked
- Fresh Cucumber: 1 cup (120 g), thinly sliced
- Creamy Sauce: ½ cup total (2 tbsp/serving; see sauce section for recipes!)
- Neutral Oil (for searing): 1–2 tbsp (avocado, grapeseed, or canola)
- Clarified Butter: 4 tsp (1 tsp per fillet) for pan-sear flavor, optional
- Cornstarch or Rice Flour: 4 tsp (1 tsp per fillet) for dusting salmon
- Toasted Sesame Oil: 4 tsp (1 tsp per bowl, for drizzling)
- Toasted Sesame Seeds: 4 tsp (1 tsp per bowl, garnish)
- Scallions & Nori (seaweed): To taste (thinly sliced green onion & nori strips—optional but amazing!)
- Kosher Salt: 3 tsp (¾ tsp per fillet, plus for rice/brine)
- Optional Crunch: Gluten-free panko or crispy rice cereal for topping
Step-by-Step Cooking Instructions
- Start the Rice: Rinse short-grain sushi rice in cool water, repeating 3–4 times until water runs beautifully clear. Soak the rice for 20–30 minutes for fluffy texture. Drain well.
- Cook the Rice:
- Rice Cooker: Combine rinsed rice and 1.1x water (e.g., 1 cup rice to 1.1 cups water). Cook using white rice setting.
- Stovetop: Use 1 part rice to 1.25 parts water. Bring to boil, cover, reduce heat to low. Simmer 12–15 minutes or until all water is absorbed. Let rest covered off heat for 10–15 minutes.
- Prepare the Salmon: Meanwhile, pat each salmon fillet thoroughly dry with paper towels. Sprinkle ¾ tsp kosher salt evenly over each side (“dry brine”). Let rest at room temperature 10–30 minutes.
- Dust & Heat: Blot the fillets again, then lightly dust the skin (or searing side if skinless) with 1 tsp cornstarch or rice flour. This supercharges crispness.
- Pan-Searing Method:
- Heat a large nonstick or cast-iron pan over medium-high heat (surface should reach ~375–400°F if using a thermometer).
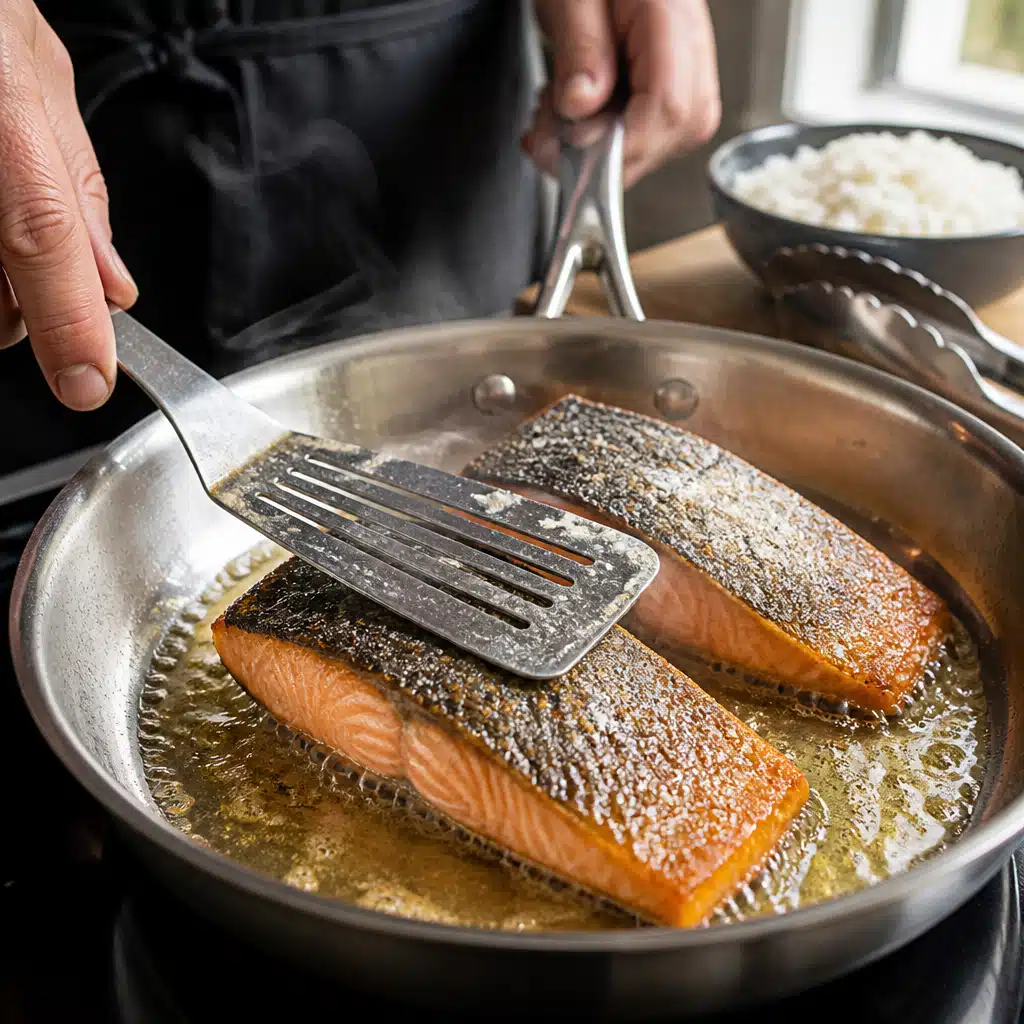
- Add 1 tsp clarified butter and 1 tbsp neutral oil. When hot but not smoking, place fish skin-side down. Press gently with a spatula for first 15–30 seconds to maximize contact.
- Cook undisturbed 4–6 minutes, watching for a deeply golden, crisp skin. Flip and cook another 1–2 minutes, aiming for 125–130°F internal temp (medium-rare) or 145°F for well done per USDA. Let rest 3–4 minutes.
- Air Fryer Method:
- Preheat air fryer for 3–5 minutes at 400°F. Mist basket or use a parchment liner for easy cleanup.
- Place salmon fillets skin-side down. Air fry 7–9 minutes for 125–130°F, or 10–12 minutes for 145°F (internal check is key!). If you want turbo crispiness, finish with 1–2 minutes at 425°F or under broiler.

Crispy Salmon Rice Bowl: Easy 30-Minute Recipe For Busy Weeknights 20 Prep Toppings: While salmon cooks, thinly slice avocado and cucumber, chop scallions, and cook shelled edamame as needed. Pat everything dry for crunch.
- Season Rice: Gently fold 1½ tbsp rice vinegar, 1 tsp sugar, and ¼ tsp kosher salt into the hot rice (scale as needed). Fluff with a rice paddle or fork.
- Assemble the Bowls: Portion ¾ cup seasoned rice into individual serving bowls. Top with a seared salmon fillet. Arrange avocado, cucumber, edamame, and scallions in bright rows or scattered for color pops.
- Add Sauce & Finish: Drizzle with 1–2 tbsp creamy sauce (see below), 1 tsp toasted sesame oil, a sprinkle of sesame seeds, and nori if using. Serve immediately while salmon is crisp!
Recipe Variations & Dietary Modifications
Customize your Crispy Salmon Rice Bowl for any diet or craving! Here are tested, foolproof pivots:
- Keto/Low-Carb Crispy Salmon Rice Bowl: Swap sushi rice for 1–1.5 cups cooked cauliflower rice per serving (season with 1 tsp lime and pinch of salt for a “sushi style” finish). Bump salmon fillet to 6 oz for extra protein; skip sweet sauces. Net carbs drop to 8–15 g and calories to ~420–480.
- Vegan/Vegetarian Crispy Salmon Rice Bowl: Replace salmon with 6 oz extra-firm tofu (pressed, cut into slabs, dusted with 1 tbsp rice flour/cornstarch). Air fry at 400°F for 12–14 min or sear until golden. Or, try roasted king oyster mushrooms with kelp granules for “sea” depth. Use vegan mayo or silken tofu for sauces!
- Gluten-Free Version: Swap soy sauce for tamari or coconut aminos. If you want a crunch topper, use gluten-free panko or crushed toasted rice cereal. Make sure your miso, panko, and sauces are certified gluten-free.
- Spicy/Mild Adjustments: Add sriracha or chili crisp to the sauce for heat; use plain mayo-yogurt with a dash of lemon for mild.
For more inspiration, peek at our Honey Peach Cream Cheese Cupcakes for a sweet finish, or check out our Air Fryer Lemon Chicken Bites for another easy, protein-packed dinner!
Serving Suggestions & Pairings
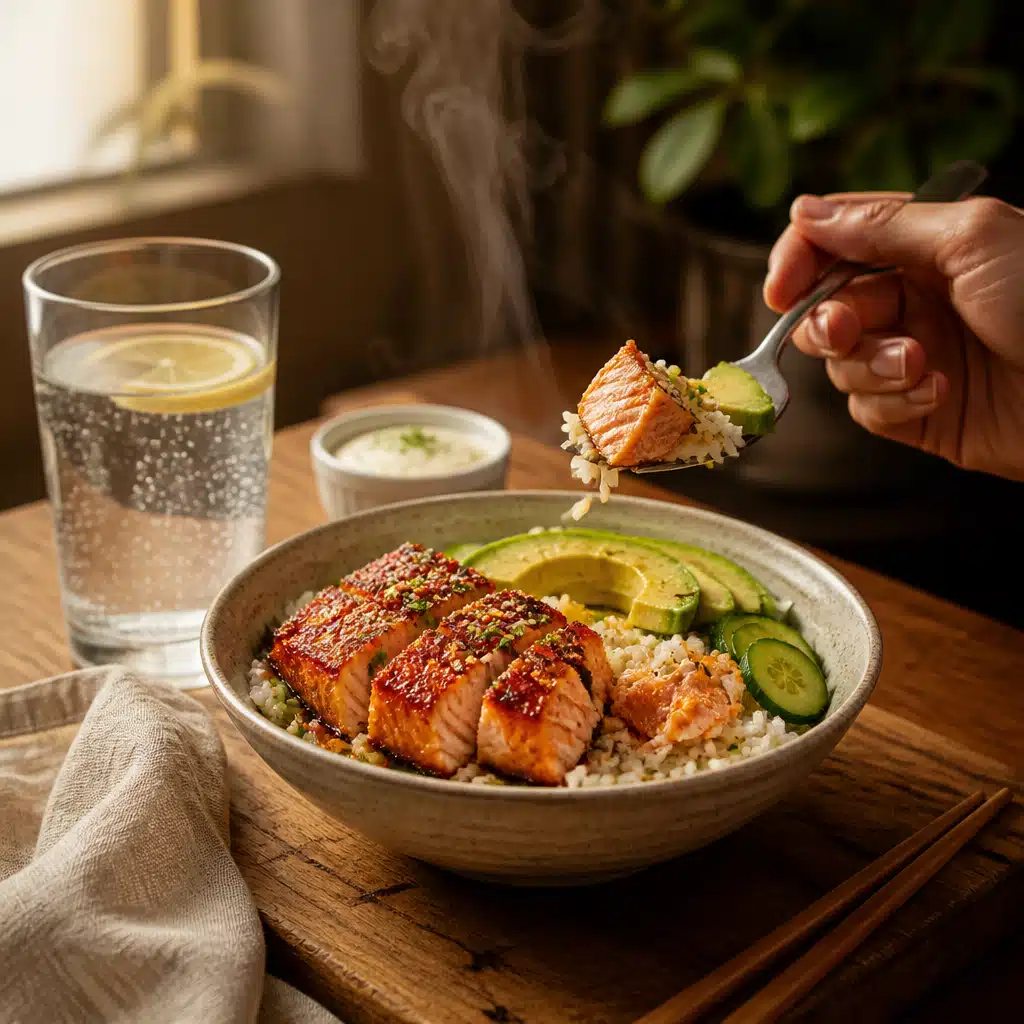
Make your Crispy Salmon Rice Bowl Insta-worthy! Use a wide, shallow bowl. Spread sushi rice as a plush base, lean crispy salmon on the side or, for ultimate presentation, slice into thick strips and fan out. Arrange avocado, cucumber, and edamame in bright “zones” or scatter for color.
Pair with quick-pickled cucumber (½ cup thin cucumber with 2 tbsp rice vinegar and 1 tsp sugar—rest 10 min), a simple miso soup, or a crisp seaweed salad for a true sushi night at home. For drinks, a light sauvignon blanc, sparkling water with yuzu, or cold-brewed green tea are perfect compliments.
Don’t forget garnish: a drizzle of sesame oil, a flutter of scallions, and nori shreds. Try upgrades like Homemade Pistachio Butter as a creative topping!
Storage & Meal Prep Tips
Fridge: Store each component separately for best freshness.
- Rice: Keeps 3–4 days. Slightly under-season, refrigerate in airtight container. Reheat with a splash of water, covered, 60–90 seconds in the microwave, or gently steam.
- Salmon: Store cooked salmon up to 2 days. For maximum crisp, cook the same day—but you can re-crisp in air fryer at 350°F for 3–5 minutes or in a 400°F oven for 4–6 minutes.
- Toppings & Sauces: Mayo-based sauces and quick pickles store 5–7 days. Keep avocado whole with pit and brush with lemon to avoid browning—best sliced just before eating.
Freezer: Cooked rice and salmon can be frozen up to 1–2 months; store in individual portions for quick defrost. Thaw in fridge overnight; reheat as above.
Meal Prep Timeline:
- Rice: Up to 4 days in advance
- Sauce, pickles: Up to 1 week
- Edamame, sliced cucumbers: 3–4 days ahead
- Salmon: Best cooked fresh, but OK up to 2 days ahead, re-crisp before serving
Perfect for busy nights, office lunches (just assemble and top with fresh avocado), or meal prep enthusiasts!
Nutritional Information
Nutrition Facts (per serving):
Calories: 700–750 kcal | Protein: 33–36 g | Carbs: 50–55 g | Fat: 35–40 g | Fiber: 7–9 g
Note: Numbers flex with your sauce and salmon serving size (e.g., 6 oz salmon adds +100–150 kcal and 10–12 g protein). Keto swaps (cauliflower rice, extra salmon) drop net carbs to ~10–15 g. Detailed data available in USDA FoodData Central.
Conclusion
If you crave big flavor and crave-worthy textures, the Crispy Salmon Rice Bowl will become your go-to dinner solution. It’s an all-in-one meal—hearty, healthy, visually stunning, and customizable for every dietary style in 2026. Whether you follow the exact method or riff with variations, you’ll always get that signature snap of crispy salmon and pillowy rice.
Share your Crispy Salmon Rice Bowl creations with us in the comments—tag your bowls on social media, swap tips, and let’s inspire other home cooks to get creative! Bookmark this page, tell your friends, and enjoy every crunchy-tender, avocado-bright bite of the best bowl you’ll make all year. The Crispy Salmon Rice Bowl is here to stay in your dinner rotation!
FAQ
How do I get the crispiest salmon skin for my Crispy Salmon Rice Bowl?
Pat the salmon fillets completely dry, dry-brine with salt for at least 10 minutes, then dust the skin lightly with cornstarch or rice flour. Use medium-high heat (375–400°F) and don’t move the fish—sear skin-side down 4–6 minutes, flip just once. If needed, finish under a broiler or air fryer for max crunch!
Can I make the Crispy Salmon Rice Bowl gluten-free?
Absolutely! Swap regular soy sauce for tamari or coconut aminos, use gluten-free panko or crushed rice cereal for crunchy toppings, and make sure miso and other sauces are gluten-free certified. This will keep your Crispy Salmon Rice Bowl delicious and safe for gluten sensitivities.
What’s the best way to meal prep this easy salmon rice bowl?
Cook rice, sauces, and toppings up to 3–4 days in advance, and store in separate airtight containers. Cook salmon fresh for ultimate crisp, but you can store and re-crisp it up to 2 days later using an air fryer at 350°F for 3–5 minutes. Always slice avocado fresh!
Can I use frozen salmon for a Crispy Salmon Rice Bowl?
Yes! Thaw salmon fillets overnight in the refrigerator, then pat very dry and proceed as usual. Avoid microwave-thawing, which creates extra moisture. Well-thawed, dry-brined fish will still yield spectacular results.
What’s a good vegan swap for salmon in this bowl?
For a plant-based Crispy Salmon Rice Bowl, press extra-firm tofu, slice into slabs, and dust with rice flour or cornstarch before pan-searing or air-frying. Or, try roasted king oyster mushrooms for a “seafood” flavor, seasoned with kelp granules. Pair with vegan creamy sauces like avocado-lime crema or a miso-tahini drizzle.
How should I store leftovers of my Crispy Salmon Rice Bowl?
Keep rice, salmon, and toppings in separate airtight containers in the fridge. Rice lasts 3–4 days, salmon up to 2 days (re-crisp before serving), and sliced veggies or sauces up to 5 days. Never store avocado sliced—keep halved with pit and lemon juice to prevent browning.
Crispy Salmon Rice Bowl: Easy 30-Minute Recipe For Busy Weeknights
Ingredients
Main
- 4 x 4 oz (113 g) skin-on salmon fillets see “Costs” for buying sushi-grade!
Rice
- 1⅓ cups (240 g) Japanese short-grain rice, uncooked makes ~3 cups cooked; ¾ cup/150 g per bowl
- 1½–1⅔ cups (330–400 mL) Water depending on method
Rice Seasoning (per 3 cups cooked rice)
- 1½ tbsp rice vinegar
- 1 tsp sugar
- ¼ tsp kosher salt
Toppings
- 2 medium Avocado cut, ½ avocado or 75 g per serving
- 1 cup (140 g) Shelled edamame cooked
- 1 cup (120 g) Fresh cucumber thinly sliced
- to taste Scallions & Nori (seaweed) thinly sliced green onion & nori strips—optional
- to taste Optional crunch (gluten-free panko or crispy rice cereal) for topping
Sauces & Garnish
- ½ cup total (2 tbsp/serving) Creamy Sauce see sauce section for recipes!
- 4 tsp (1 tsp per bowl) Toasted sesame oil for drizzling
- 4 tsp (1 tsp per bowl) Toasted sesame seeds garnish
Fats, Dusting & Seasonings
- 1–2 tbsp Neutral oil (avocado, grapeseed, or canola) for searing
- 4 tsp (1 tsp per fillet) Clarified butter optional, for pan-sear flavor
- 4 tsp (1 tsp per fillet) Cornstarch or rice flour for dusting salmon
- 3 tsp Kosher salt ¾ tsp per fillet, plus for rice/brine
Instructions
Step-by-Step Cooking Instructions
- Start the Rice: Rinse short-grain sushi rice in cool water, repeating 3–4 times until water runs beautifully clear. Soak the rice for 20–30 minutes for fluffy texture. Drain well.
- Cook the Rice: Rice Cooker: Combine rinsed rice and 1.1x water (e.g., 1 cup rice to 1.1 cups water). Cook using white rice setting. Stovetop: Use 1 part rice to 1.25 parts water. Bring to boil, cover, reduce heat to low. Simmer 12–15 minutes or until all water is absorbed. Let rest covered off heat for 10–15 minutes.
- Prepare the Salmon: Meanwhile, pat each salmon fillet thoroughly dry with paper towels. Sprinkle ¾ tsp kosher salt evenly over each side (“dry brine”). Let rest at room temperature 10–30 minutes.
- Dust & Heat: Blot the fillets again, then lightly dust the skin (or searing side if skinless) with 1 tsp cornstarch or rice flour. This supercharges crispness.
- Pan-Searing Method: Heat a large nonstick or cast-iron pan over medium-high heat (surface should reach ~375–400°F if using a thermometer). Add 1 tsp clarified butter and 1 tbsp neutral oil. When hot but not smoking, place fish skin-side down. Press gently with a spatula for first 15–30 seconds to maximize contact. Cook undisturbed 4–6 minutes, watching for a deeply golden, crisp skin. Flip and cook another 1–2 minutes, aiming for 125–130°F internal temp (medium-rare) or 145°F for well done per USDA. Let rest 3–4 minutes.
- Air Fryer Method: Preheat air fryer for 3–5 minutes at 400°F. Mist basket or use a parchment liner for easy cleanup. Place salmon fillets skin-side down. Air fry 7–9 minutes for 125–130°F, or 10–12 minutes for 145°F (internal check is key!). If you want turbo crispiness, finish with 1–2 minutes at 425°F or under broiler.
- Prep Toppings: While salmon cooks, thinly slice avocado and cucumber, chop scallions, and cook shelled edamame as needed. Pat everything dry for crunch.
- Season Rice: Gently fold 1½ tbsp rice vinegar, 1 tsp sugar, and ¼ tsp kosher salt into the hot rice (scale as needed). Fluff with a rice paddle or fork.
- Assemble the Bowls: Portion ¾ cup seasoned rice into individual serving bowls. Top with a seared salmon fillet. Arrange avocado, cucumber, edamame, and scallions in bright rows or scattered for color pops.
- Add Sauce & Finish: Drizzle with 1–2 tbsp creamy sauce (see below), 1 tsp toasted sesame oil, a sprinkle of sesame seeds, and nori if using. Serve immediately while salmon is crisp!
Notes